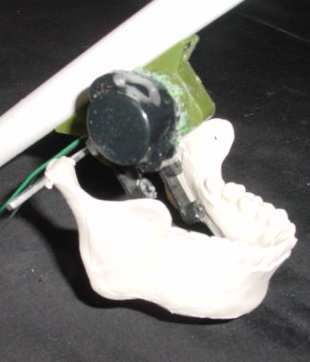
This is the jaw in the resting position of the motor. I was amazed at the abuse these little motors could take and still work afterwards. One very important tip when inserting the rod through the jaw and motor is that as soon as you have done this, please fit the jaw to the skull. One of the talking skulls could not be finished on saturday because the jaw was a little distorted and no longer fit in the socket of the skull. Not to worry....Uncle Clamp-It to the rescue. The skull was turned over and one jaw placed into its socket. A clamp was attached to the jaw bone and pressure applied until both joints fit into their respective spots. Unfortunately, Bucky has had to wear his new dental appliance for a short time until the jaw bone returns to normal. |
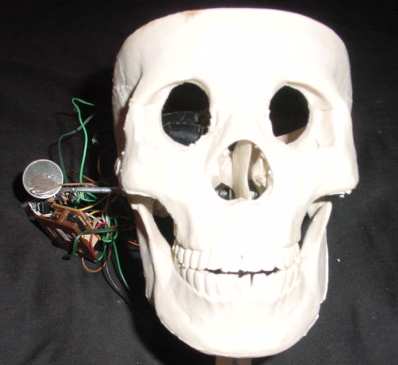
Isn't he just a happy looking fella?! If you look through the the eye socket on the left side of the picture, you can make out the motor for the jaw. Part of the rod, motor and plastic mouth brace can be seen through the nasal cavity. My bucky will require a little nasal epoxy surgery to put his separation bone back into proper alignment. All the garbage on the left is what you wind up dragging around with you while you are working with him. |
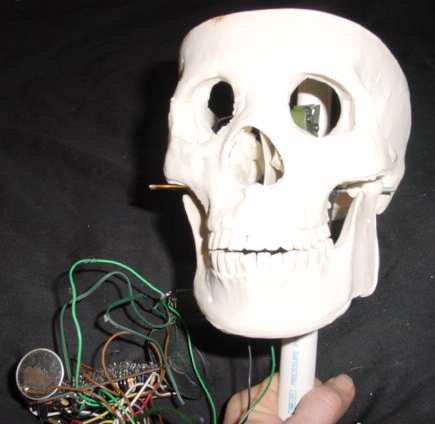
Another shot of Bugie (cross of Dougie and Bucky). You can see the rod extending out of both sides of the head and the spot where the motor was attached to the pvc. The nice thing about the rod is that you can adjust where the two plastic support bars are and how the motor is positioned. I measure my pvc (1/2") so that when the cranial cap is attached, the end of the pvc will touch the inside of the cap. Once I had the motor in the right position and the cap on the head, I was able to look through the eye cavity and mark where on the pvc that I should attach the motor. |